This topic details how to configure authentication for custom apps and pods launched on DC/OS.
Prerequisites:
- DC/OS CLI installed and be logged in as a superuser.
- DC/OS Enterprise CLI 0.4.14 or later installed.
- You must get the root cert before issuing the
curlcommands in this section.
Create a Key Pair
Create a 2048-bit RSA public-private key pair using the DC/OS Enterprise CLI. Save each value into a separate file within the current directory.
dcos security org service-accounts keypair <private-key>.pem <public-key>.pem
Use the DC/OS Secret Store to secure the key pair.
Create a service account
You can use either the DC/OS Enterprise CLI or the DC/OS web interface to create a service account.
Using the DC/OS Enterprise CLI
From a terminal prompt, create a new service account (<service-account-id>) containing the public key (<your-public-key>.pem).
dcos security org service-accounts create -p <your-public-key>.pem -d "<description>" <service-account-id>
Verify your new service account using the following command.
dcos security org service-accounts show <service-account-id>
Using the web interface
-
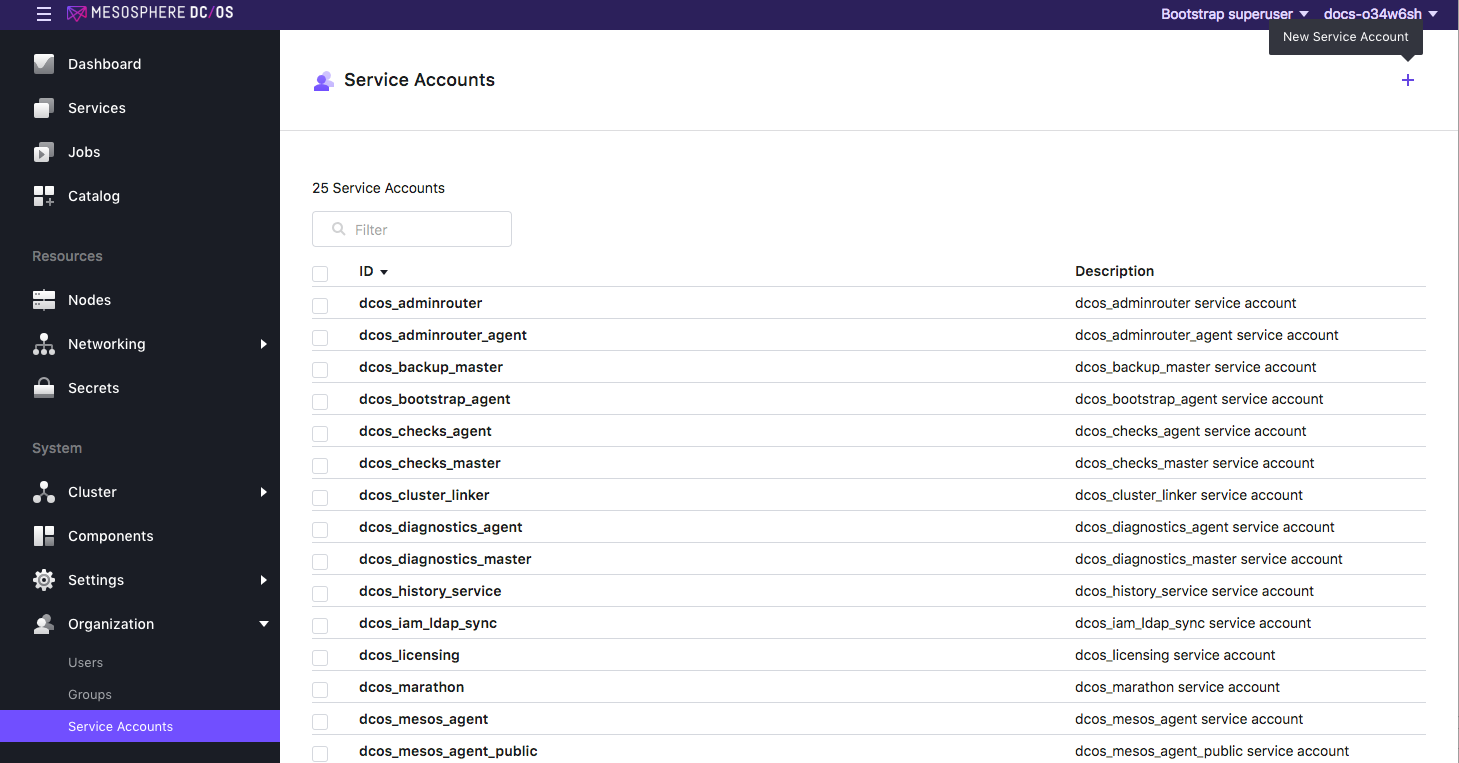
In the DC/OS web interface, navigate to the Organization -> Service Accounts tab.
-
Click the + icon in the top right.

Figure 1. Click the service account create button
-
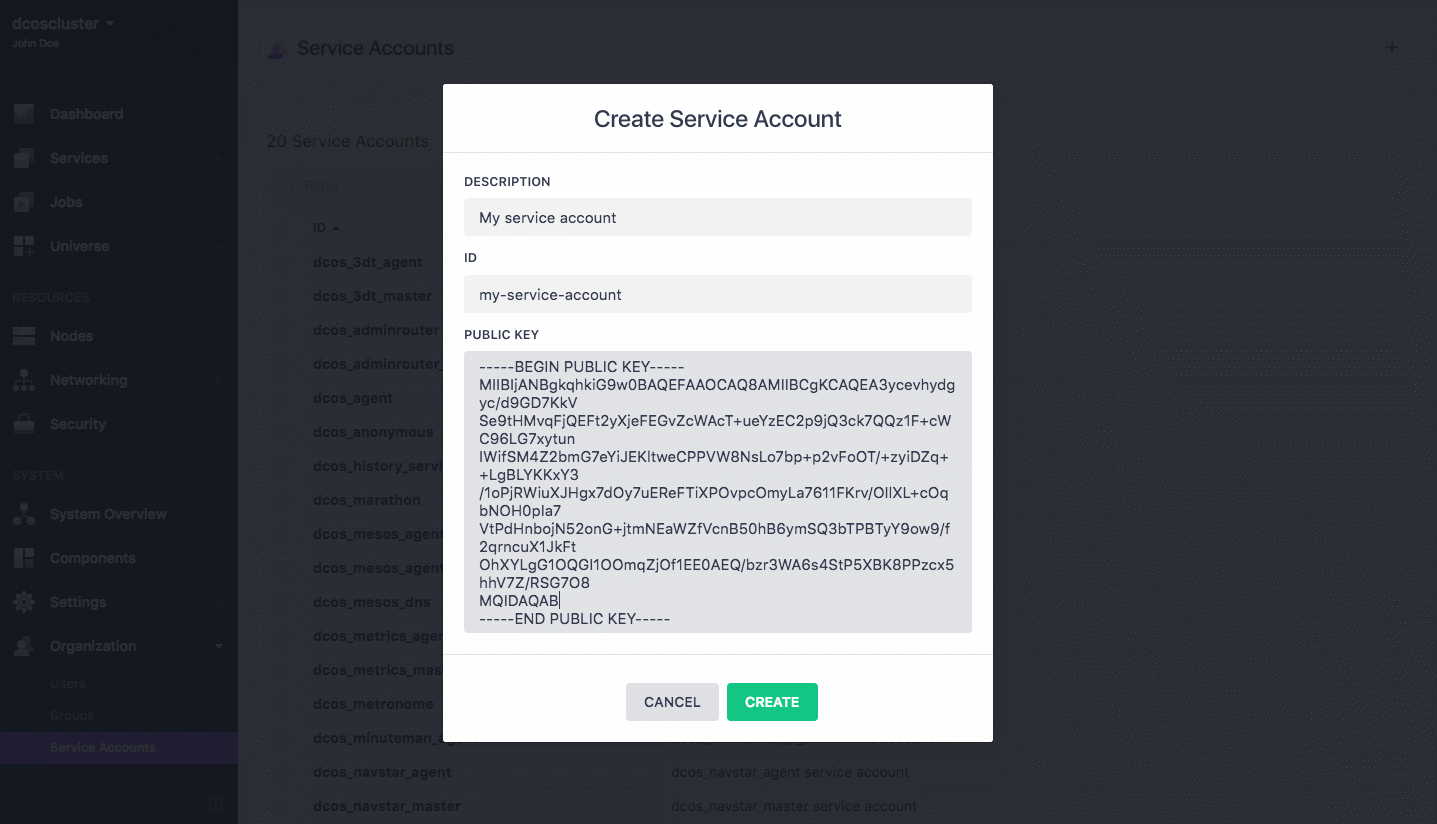
Enter a description and type the Service Account ID in the ID field.
-
Paste the public key associated with the account into the PUBLIC KEY field.

Figure 2. Create new service account
Create a secret
Create a secret (<secret-name>) with your service account (service-account-id>) and private key specified (<private-key>.pem).
Permissive
dcos security secrets create-sa-secret <private-key>.pem <service-account-id> <secret-name>
Strict
In strict mode, the service account name (<service-account-id>) must match the name specified in the framework principal.
dcos security secrets create-sa-secret --strict <private-key>.pem <service-account-id> <secret-name>
List the secrets with this command:
dcos security secrets list /
Create and assign permissions
Determine the required permissions
Determine what access your service account requires by using this procedure. This will allow you to rule out any functional issues that might be caused by incorrect permissions.
-
dcos node ssh --master-proxy --mesos-id=<mesos-id> -
Run this
grepcommand to view thedenylogs for your service account (<service-account-id>).journalctl -u "dcos-*" |grep "audit" |grep "<service-account-id>" |grep "deny"This command will return a list of the audit logs that are generated when your service was denied access due to insufficient permissions or a bad token. The rejection messages should include the permission that was missing. You might need to repeat this process several times to determine the full list of required permissions.
Troubleshooting
You can grant your service superuser permission to rule out any functional issues. All valid services should be able to run as superuser.
curl -x put --cacert dcos-ca.crt \
-h "authorization: token=$(dcos config show core.dcos_acs_token)" $(dcos config show core.dcos_url)/acs/api/v1/acls/dcos:superuser/users/<service-account-id>/full
For more information, see the permissions reference.
Assign the permissions
Using the permissions reference and the log output, assign permissions to your service. All CLI commands can also be executed via the IAM API.
Using the CLI
You can assign permissions using the CLI. For example, to authorize the Cassandra service to be uninstalled on DC/OS:
Grant the permissions (dcos:mesos:master:framework:role:cassandra-role) and the allowed actions (create).
dcos security org users grant <service-account-id> dcos:mesos:master:framework:role:cassandra-role create --description "Controls the ability of cassandra-role to register as a framework with the Mesos master"
Using the web interface
-
Log into the DC/OS web interface as a user with the superuser permission.
-
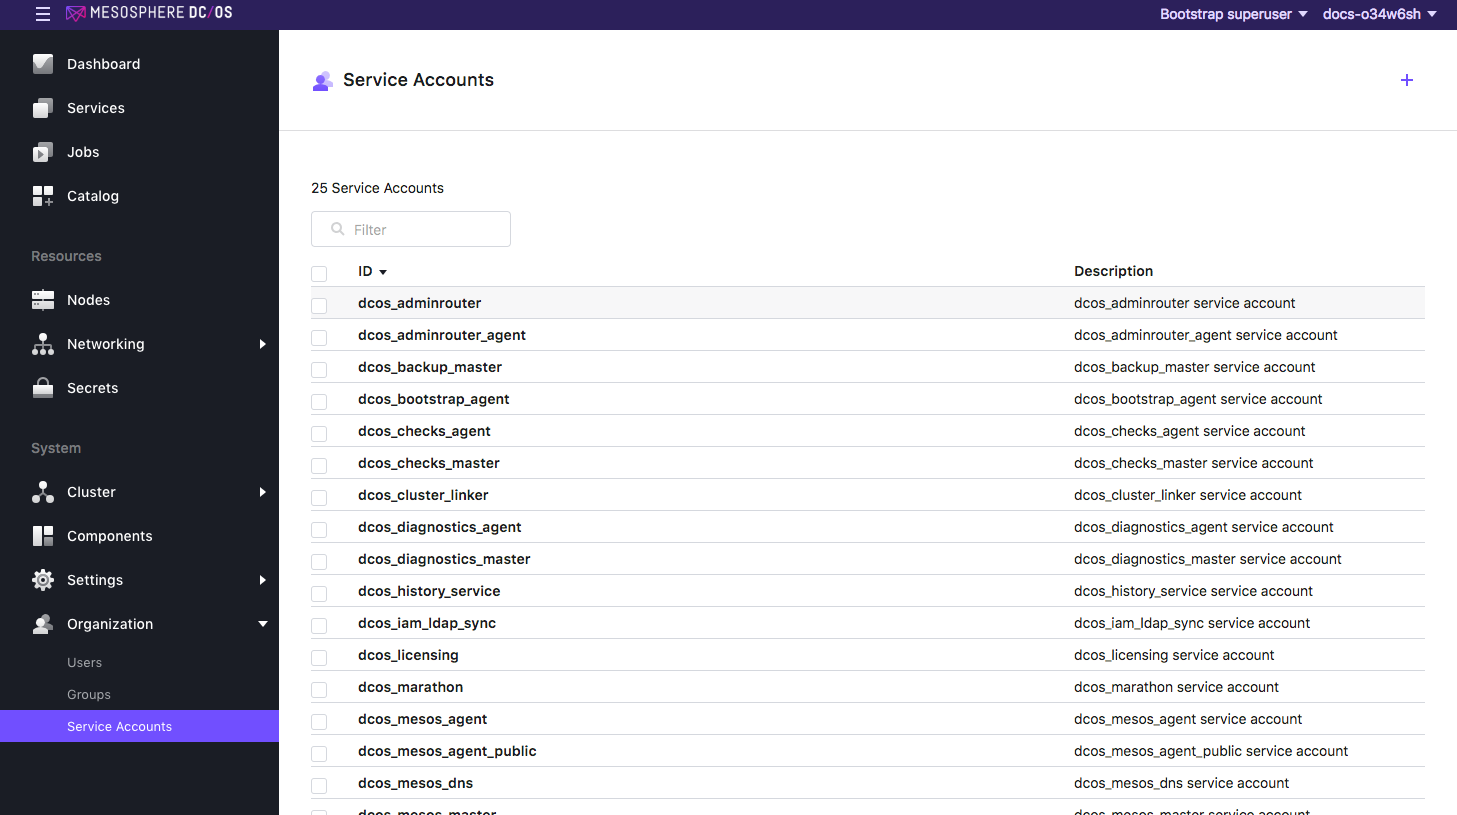
Select Organization > Service Accounts.
-
Select the name of the service account to grant the permission to.

Figure 3. Select service account
-
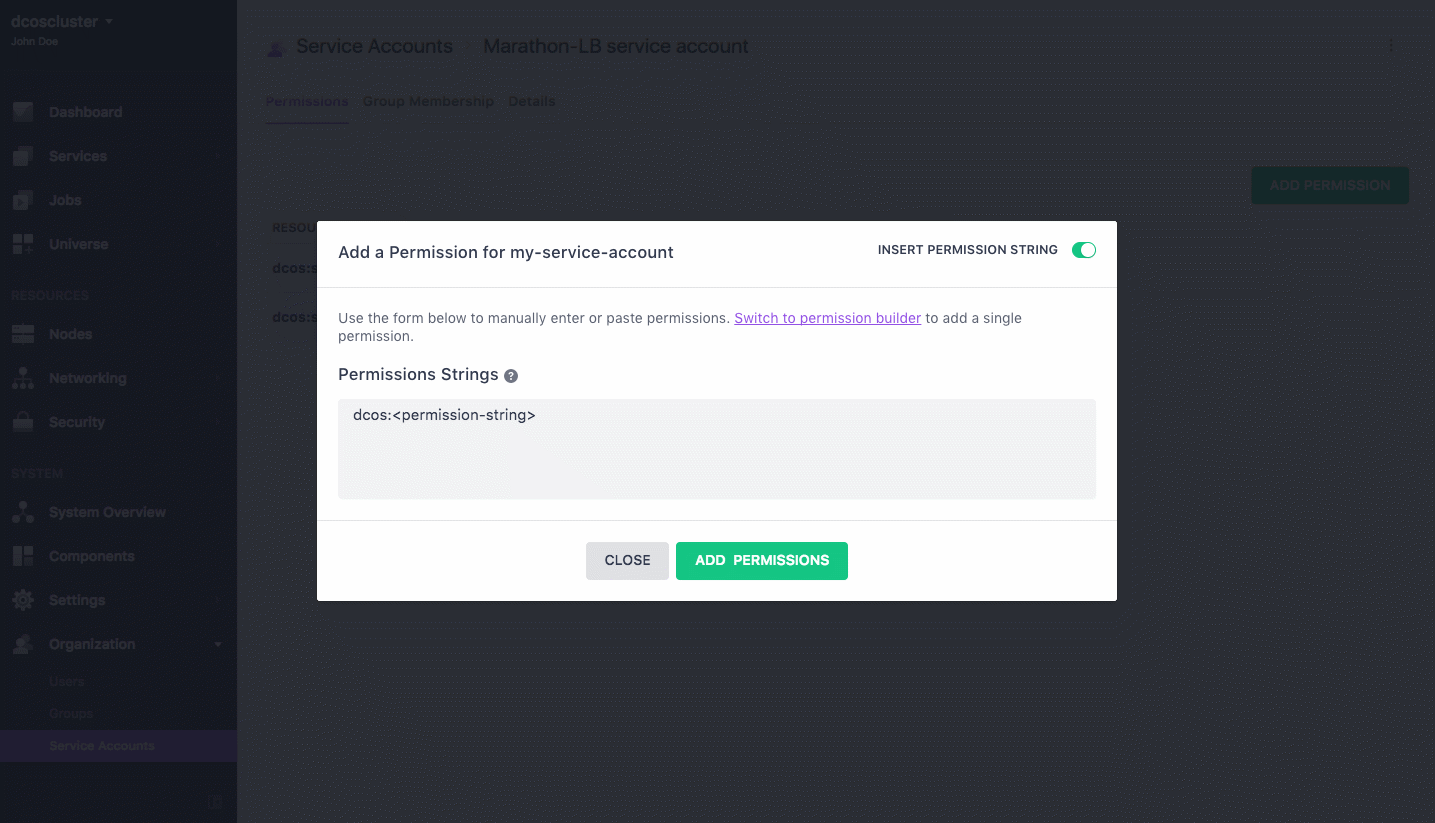
From the Permissions tab, click ADD PERMISSION.
-
Click INSERT PERMISSION STRING to toggle the dialog.
-
Copy and paste the permission in the Permissions Strings field.

Figure 4. Service account permissions string
Request an authentication token
Generate a service login token, where the service account (<service-account-id>) and private key (<private-key>.pem) are specified.
dcos auth login --username=<service-account-id> --private-key=<private-key>.pem
Pass the authentication token in subsequent requests
After the service has successfully logged in, an authentication token is created. The authentication token should used in subsequent requests to DC/OS endpoints. You can reference the authentication token as a shell variable, for example:
curl -H "Authorization: token=$(dcos config show core.dcos_acs_token)"
Refresh the authentication token
By default, authentication tokens expire after five days. Your service will need to renew its token either before or after it expires. The token itself contains the expiration, so your service can use this information to proactively refresh the token. Alternatively, you can wait to get a 401 from DC/OS and then refresh it.
To refresh your authentication token, just repeat the process discussed in Request an authentication token.
DC/OS-native service accounts
The credentials of DC/OS-native service accounts are private to DC/OS and must not be consumed by third-party software (such as ad-hoc scripts).
Background: the privileges granted to DC/OS-native service accounts can change during a DC/OS upgrade procedure. That is, consumers other than DC/OS-native services can break during a DC/OS upgrade. Notably, third party software must not mutate the privileges associated with DC/OS-native service accounts (the mutations can be reverted at any point in time).
There is an exception for dcos_marathon and dcos_metronome service accounts that will keep modified privileges because in the strict security mode, some users of DC/OS Enterprise give dcos_marathon and dcos_metronome permissions so that these services can run tasks as Unix users other than nobody.
 DC/OS Documentation