This section discusses the general requirements of OpenID IdPs, and provides a step-by-step procedure for setting up a OneLogin IdP.
DC/OS Enterprise can integrate with any identity provider (IdP) that uses OpenID Connect 1.0. The following procedure will take a Google IdP as an example and walk you through each step of the set up process.
Adding an OpenID Connect identity provider
You can add a Google OpenID Connect IdP in Google or DC/OS.
Configuring the IdP in Google
-
If you already have a project, click Select a Project, select the project, and click Open.
If you do not already have a project, click Create a project, type the name of your project in the Project Name box, opt in or out of email communications, accept the terms of service, and click Create.
-
In the Credentials dialog, select OAuth client ID.
-
Click Configure consent screen.
-
The next screen allows you to provide a range of information to be displayed to users when they provide their credentials. At a minimum, you must specify a name for the IdP in the Product name shown to users box.
-
Click Save.
-
Select Web application as the Application type.
-
Type a name for the IdP in the Name box.
-
Paste the URL of your cluster into the Authorized JavaScript origins box. Example:
https://jp-ybwutd-elasticl-1r2iui8i0z9b7-1590150926.us-west-2.elb.amazonaws.comIf your cluster is fronted by a load balancer (recommended) the cluster URL will be the path to the load balancer. The cluster URL is the same as the path to the DC/OS UI and can be copied from your browser bar. Alternatively, you can log into the DC/OS CLI and type
dcos config show core.dcos_urlto get your cluster URL. -
Paste your cluster URL into the Authorized redirect URIs field as well.
-
Paste
/acs/api/v1/auth/oidc/callbackto the end of your cluster URL in the Authorized redirect URIs field. Example:https://jp-ybwutd-elasticl-1r2iui8i0z9b7-1590150926.us-west-2.elb.amazonaws.com/acs/api/v1/auth/oidc/callback -
Click Create.
-
Copy and paste the client ID and client secret values to a text file.
Configuring the IdP in DC/OS
-
Log into the DC/OS UI as a user with the
dcos:superuserpermission. -
Open the Settings -> Identity Providers tab.
-
Click the + icon in the top right.
-
Click OpenID Connect.
-
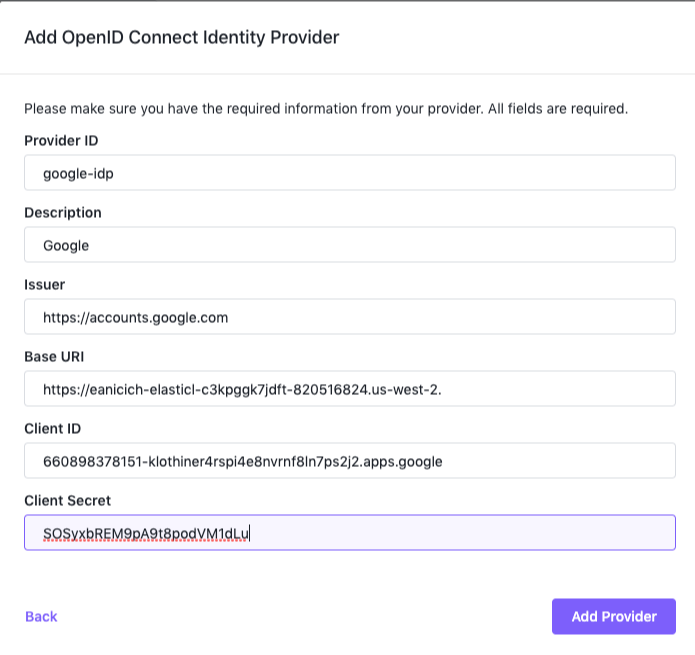
Type a name for your IdP in the Provider ID field. This name will be passed in a URL, so make sure it contains only lowercase alphanumeric and
-characters. Example:google-idp. -
Type a human-readable name for your IdP in the Description field. Example,
Google. -
Paste the following into the Issuer field:
https://accounts.google.com. -
Paste your cluster URL into the Base URI field. Please see the previous section for more information on obtaining this value.
-
Paste the client ID value from Google into the Client ID field.
-
Paste the client secret value from Google into the Client Secret field.

Figure 1. Google IdP configuration
-
Click Add Provider.
-
You should now see your new IdP listed in the DC/OS UI.
Verifying the IdP
About verifying the IdP
You can use either of the following to verify that you have set up your IdP correctly.
Using the DC/OS GUI
-
Sign out of the DC/OS GUI.
-
You should see a new button on your login dialog that reads LOGIN WITH GOOGLE.
-
Click the new button.
-
You will be redirected to Google.
-
Click to allow DC/OS access to your Google account information.
-
You should see an Access Denied message from DC/OS. This signifies that the logon was successful, the user account has been added to DC/OS, but the new user has no permissions and therefore cannot view anything in the DC/OS UI.
-
Click LOG OUT.
-
Log back in as a user with the
dcos:superuserpermission. -
Open the Organization -> Users tab.
-
You should see your new user listed there.
-
Assign this user the appropriate permissions.
Using the DC/OS CLI
Prerequisite: DC/OS CLI installed.
-
Use the following command to log in as your new user.
dcos auth login --provider=google-idp --username=<user-email> --password=<secret-password> -
The CLI should return a message similar to the following.
Please go to the following link in your browser: https://eanicich-elasticl-c3kpgqk7jdft-820516824.us-west-2.elb.amazonaws.com/acs/api/v1/auth/login?oidc-provider=google-idp&target=dcos:authenticationresponse:html -
Copy the path and paste it into your browser.
-
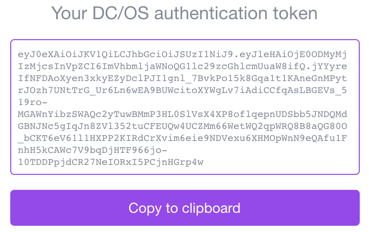
You should see a message similar to the following.

Figure 2. CLI IdP auth token
-
Click Copy to clipboard.
-
Return to your terminal prompt and paste in the authentication token value.
-
You should receive the following message.
Login successful!
 DC/OS Documentation